I’ve seen other attempts at universal ADB (Android Debug Bridge) drivers, but I’ve tested those and not had any luck. The following steps have worked for a wide variety of devices that I’ve tested it with. With such a huge variety of different Android devices available it isn’t always easy to find the right USB driver, but you need an ADB USB driver to connect development and debugging tools. This is different then being able to add and remove files from the Android device.
Disclaimer: I’ve done this a few times, and talked to others who have done it too, all without any incident. This is however a bit of a hack, and may result in some unintended consequence, which may including voiding your warranty, damaging your computer, damaging your android device, or even causing your hair to fall out. Proceed at your own risk.
First of all, you need the Android SDK installed. You don’t need the ADT Bundle or Android Studio if you don’t want those. Just scroll down to Use an Existing IDE. If you have RAD Studio XE5 (an edition with Mobile) installed then you had the option to install this during the RAD Studio install. I’ll include directions for either installation method. Google provides a USB driver for their Nexus line of devices. This is the driver we are going to use, but first we need to modify it to work with our device. I’m assuming you are running Windows. OS X doesn’t need device specific USB drivers.
These directions are for Windows 8.1. Run the Android SDK Manager. You can do this from the Android Tools start menu item that is installed with RAD Studio, or run the android.bat file located in the SDK\Tools folder of the Android SDK installation. This brings up the Android SDK Manager. Scroll to the bottom and look for Google USB Driver in the Extras category. If that is not installed then put a check mark next to it and install it.  Next go to the folder where your Android SDK is installed. With RAD Studio XE5 the default install location is under Users\Public\Documents:
C:\Users\Public\Documents\RAD Studio\12.0\PlatformSDKs\adt-bundle-windows-x86-20130522
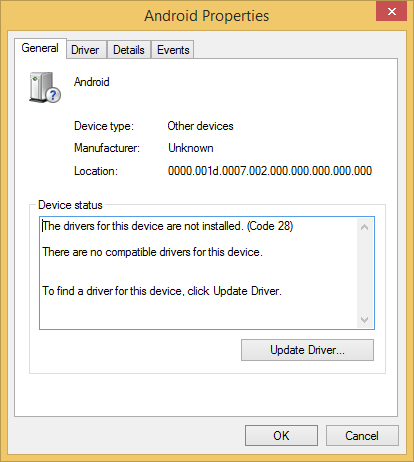
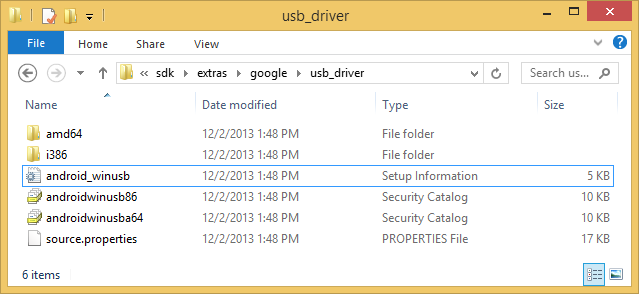
From there go to the \sdk\extras\google\usb_driver folder, as that is where the Google USB Driver is installed. I typically make a copy of these folder somewhere else, as we will be modifying some of these files. If you get an updated driver, then your changes will be overwritten if you leave them here. Next we need to go to Device Manager with your new Android device attached (and in developer mode). Look for the entry for Android under Other devices.  This is your Android device without a driver loaded. If you don’t see it then either it isn’t connected, or your Android device isn’t in developer mode. It is possible it may show up with the name of the Android device, but it should still be under “Other devices” and have the yellow triangle on it. Right click on this device and select properties.
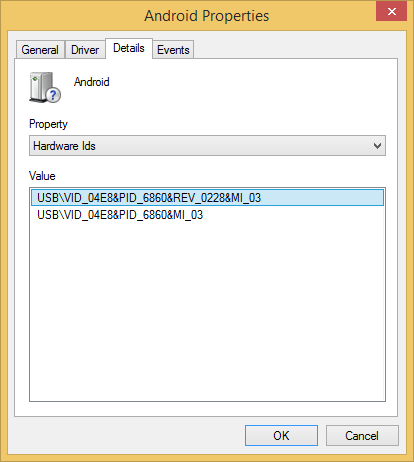
  Then go to the Details tab and from the dropdown select the Hardware Ids property.
These are the identification for your specific Android device. It should look similar to the picture above.

Now using your favorite text editor open the android_winusb.inf file we found in the usb_driver folder above. Locate the line that says [Google.NTamd64]. You’ll see some entries above this line, these are for 32-bit installs (it is section [Google.NTx86]), and the entries after the line are for 64-bit installs. Chances are you only need to edit one section, since you are doing this for your own windows install, but you can edit both sections if you are not sure. The lines are the same.
So add lines similar to the following in the section(s) you choose.
;Samsung Galaxy S3
%SingleAdbInterface% = USB_Install, USB\VID_04E8&PID_6860
%CompositeAdbInterface% = USB_Install, USB\VID_04E8&PID_6860&MI_03
You probably noticed that is that crazy looking string on the right looks really similar to the values we saw for the Hardware Ids from device manager. The line prefixed by the semicolon is a comment, so I usually put the name of the device there.
Notice that the portion of the identifier with REV_#### is missing (I usually leave it off, but it should work either way). Also the %SingleAdbInterface% line doesn’t have the MI_## portion, while the %CompositeAdbInterface% line does include it. You might need to experiment with this to find what works (again remember the disclaimer).
If you want to load the driver for Google Glass, then it should look something like the following.
;Google Glass
%SingleAdbInterface% = USB_Install, USB\VID_18D1&PID_9001&REV_0216&MI_01
%CompositeAdbInterface% = USB_Install, USB\VID_18D1&PID_9001&MI_01

%SingleAdbInterface% = USB_Install, USB\VID_18D1&PID_9001&REV_0216&MI_00
%CompositeAdbInterface% = USB_Install, USB\VID_18D1&PID_9001&MI_00
(the first two lines are for the 2nd edition, the second two lines are for the 1st edition I believe).
Advanced: If you want to load the driver for the bootloader, then put your device into bootloader mode and add a %SingleBootLoaderInterface% line for the value that shows up in Device manager then (it will be different).
Now save the android_winsub.inf file. Unfortunately since it is modified, the signature is invalid and Windows won’t let you load it. With Windows XP this wasn’t such a big deal, but in recent versions the driver signature is enforced. There is a way around it though.
Check out the following guides for loading unsigned drivers in specific OS:
I’ve also made a video of the process on Windows 8.1